Saturday, December 14, 2013

How to create a Wool Sleeping Beauty Doll

How to make a Sleeping Beauty doll with wool:

Materials:
* 6 inch cotton pipe cleaner
* 4 inch tubular cotton stockinet
* some cotton, doll makers Jersey fabric for the skin (an old t-shirt will do)
* Sewing needle and some thread
* some colored wool of your choice 
* woodland wreath
* felting needle (optional)


Create the head
Sew on the skin, then place the pipe cleaner in the center to make the arms.  Be sure the arms are the same length.
Sew the skin around the arms 
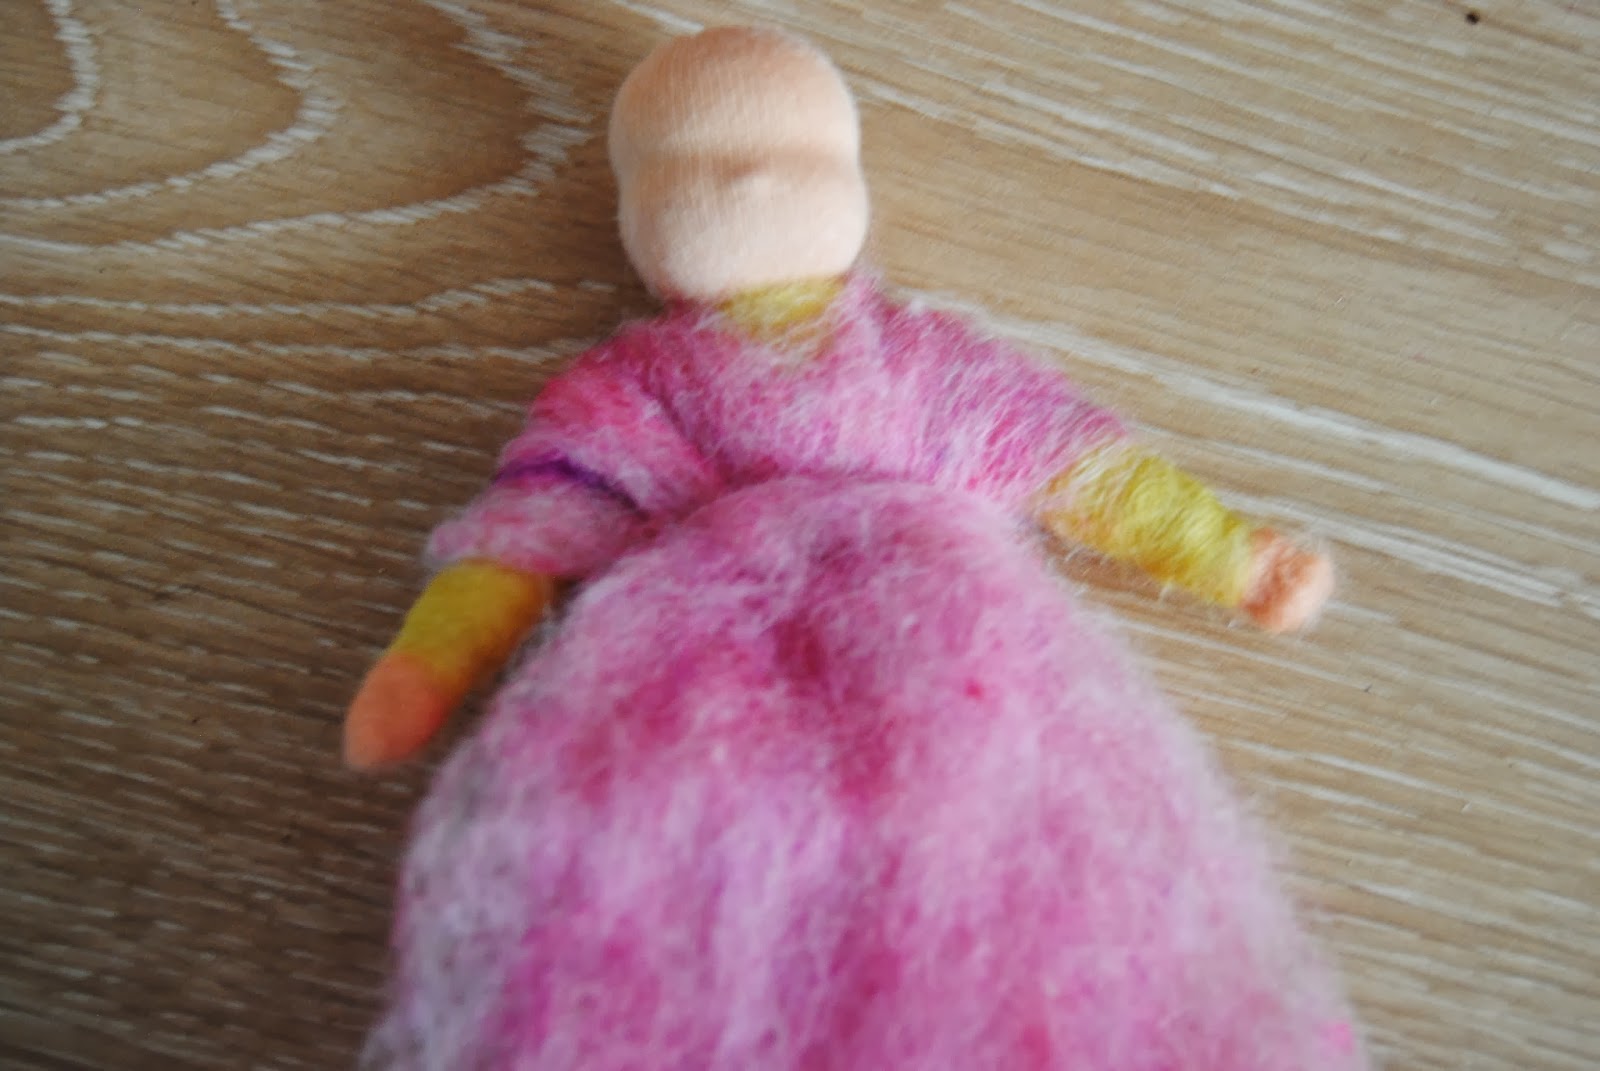
Wrap some wool roving around your pipe cleaner  
Repeat on both arms


Create a shirt by wrapping wool of another color around the arms and body

Make a hole for the head in a flat layer of wool
Push the head through the hole, and over the arms in the front.
Wrap a small "string" of the same color wool around the waste nice and tight. 
Move the wool around to get it where you like it on the arms
Finish off by needle felting or sewing the hair, and drawing the face.
Place her on the woodland wreath, or anything else for her to rest comfortably on while she sleeps

Monday, November 4, 2013

How to make a doll wig without crochet


I had a lot of request on how to make my wig without crocheting and here is the end result happy wig making and remember you can always contact me 

Sunday, October 13, 2013

Mohair weft tutorial

Please use  the instruction for your personal use or on your dolls for sale if you are giving tutorials based on my technique please  be so kind and give credit when credit is due.that is the right way of sharing knowledge.   Starting today I will teach you how to make a wefted Mohair wig .  I want to make sure that you will be making the best wig ever. And for that you need brushed Mohair or yarn of your choice I just like brushed mohair and weft of your choice . And this is how you make a nice and tight wig . And you probably wonder how can I do that well is the size crochet hook I use the smallest I can possibly crochet  with it is a little bit harder but the end result is amazing you will not have any gaps and it will appear more natural so get yourself a small crochet hook and then lets start .
I c
Here you can see how small my hook is but trust me it is worth it 


it is hart to see but I first crochet into the weft about 4 and then I fold it over to crochet in the round
crochet two single stitches in one opening to MAINTAIN a flat surface

just remember crochet two single crochet in one whole till it measures 4 inches ,or what ever size you need
Just keep going in the round 
Depending on the circumference of your dolls head Measure the flat part, mine measures 4 inches That's for a 13 inch circumference on my doll and then I start to single crochet 
because  you only crochet one in each hole you're not adding stitches anymore and it should start forming a cap


Thursday, April 18, 2013

Doll Making Wig Tutorial

Here is a link to the wefted mohair wig tutorial I made.

This is what you need:
Mohair yarn to match your weft or wool (www.mohairwig.com Susan Doyle)
Crochet needle

Instead of every other row, single crochet the weft in every row.

This wefted Mohair  wig method is my personal one, but I give it to you as a gift to use for your own doll making.  You may use my wig tutorial to make wigs for the dolls you sell, when credit is given to me for the technique.  This tutorial is not to be copied and resold as your own wig tutorial. Also, wigs made from my tutorial are not to be sold individually. Thank you for respecting and honoring my work.

Friday, March 29, 2013

How to Make a Small Waldorf Doll


To print this pattern, save it onto your computer, open it up, and then print it.

This is what you'll need to make your lilliput: cotton fabric big enough to fit your pattern (an old baby outfit that you loved will do), jersey knit fabric for the face and hands and feet, cotton stockinet wool for stuffing (but if you don't have wool you can use fiber fill it is optional but not my choice), embroidery floss a strong cotton string or floss dental floss, a three inch needle and a size 10 quilters between needle you can find them in fabric stores, a pair of scissors, a chopstick or wooden spoon if you don't have a chopstick, and a measuring tape, bobby pins, and of course the pattern ...
If you don't have a tubular stockinet available just use an old sock or new, up to you. Cut the bottom of the foot, make sure it's two inches wide and seven inches long. Sew the top nice and firm so it looks like a round top, not square.

Get your wool about a good handful, about 7 and a half ounces of wool, two strong strings one to tie the neck with and one to shape the head. Now is a good time to get your wooden spoon and a crochet hook. If you don't have a hook, get a teaspoon and no we're not having tea, we're making the head. The spoon is for pulling the string on the back of the head but I will show you


Make sure your head is nice and full, not too soft or else your doll will have a sausage for a head. Unless you have a barbeque. Make sure you do not let go of the bottom because wool will expand and you'll have to do it all over again. After you tie it it will be no problem


your head will measure 8 inches in circumference, seems big but it's not.

It should look like this and your circumference should only be 7 inches

X marks the spot, that is where you secure your thread on each side with multiple stitches in the shape of a cross, make sure it's very secure otherwise it will come loose

After you secure both sides take your crochet hook and pull the thread down till it forms a pretty shape like the back of a head 

this is what it should look like. 

Take your jersey of whatever color you have available, it doesn't matter which color, your baby will love whatever you make. with a hidden stitch all around the top of the head and down the back till you reach the neck. Pull down the extra fabric and tie the neck really tightly with the same thread and secure your stitches. If there is too much fabric you can always trim some of it at the neck area.
this is what it should look like before you secure the bottom. I want you to use a little bit of your wool the size of a walnut and fill it and then sew it like shown on the next picture.

it should look like this.

Day 2


Place your pattern on your fabric and pin securely.

Do the same for the hands and feet.

Cut out the pattern. You don't  need a seam allowance because it's already calculated into the pattern.

The two pieces for the feet have to be 1  1/2 inches wide and 3 inches long.

Pin the fabric as shown on the picture.

As you can see I folded it and pressed it with my iron. Pin it so it stays in place and then machine sew all your seams all around.

This is what it should look like after you are done sewing it. You can either sew them square or round. I like to sew them round.

Fold your body in half and on the top-right corner just so slightly cut an opening about 2 inches, but don't butcher the neck.

Your foot should look like this.

And this is what it should look like.

Fill the foot with just enough wool to fill the foot and then pin the foot shot so the wool stays in place. Then put some more wool into the leg.

As you can see I just filled the leg with a little wool so I can do my ladder stitch or a hidden stitch and bend the foot forward holding it with your thumb and fingers while you sew as shown below.

It should look like this. Do the same with the other leg.

Fill the rest of the body to the top but not the arms, then attach the head to the body. Sew it with a ladder stitch. Take straight pins and line with the form of the body shape. It should almost be like a triangle, but not pointy on top. You will get a feel for it. I will add a little video later to show it better. After you have done this step, hand stitch along where you just pinned. Make sure you take your pins out afterwards. You could stuff the arms but I don't.
These are the pieces you need for your hands. Take your string and gather all around the fabric circle. Make a little woolen ball in the size of a small marble, put it inside and pull your string tight to form a little ball covered in fabric and secure the back. Then take your little hand...

And place on the end of your arm. Secure with pins so hand stays in place. Take your needle and do a ladder stitch or hidden stitch. Make sure to sew it nice and neat and tight....
Look what it can look like if you add a nose, ears, and a smile